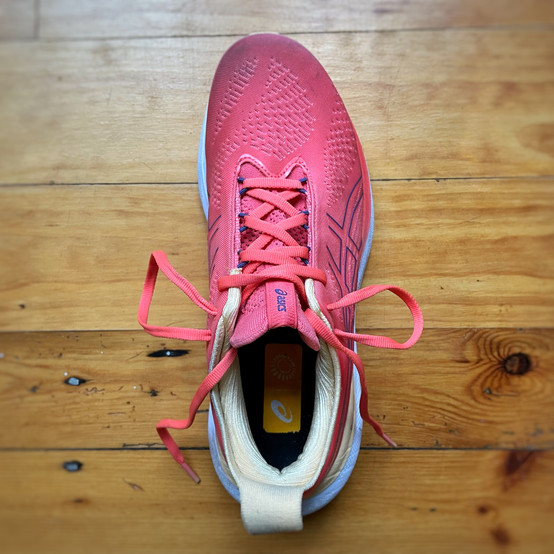
RUN SERIES #4 : Lacing Techniques
- Nikki Parker

- Apr 23, 2023
- 4 min read
Updated: May 14, 2025
Of course we all learnt how to tie our laces back in the day, but did you know there are different methods to tie your laces depending on your foot shape, type of shoe and to alleviate pressure and provide improved comfort and support?
Here are some of the most commonly used lacing techniques:
1. The Standard
To kick off, let's begin with the good, old-fashioned tie. It is the most commonly used method when lacing any shoe. It is simple, effective and easy to do.

METHOD: Start by lacing the shoes through the bottom two eyelets, leaving enough room to be able to wiggle your toes. Then, cross the laces over and thread them through the next set of eyelets, pulling them firmly. Continue to lace the shoes in this manner until you reach the top, tying the laces in your usual method.
PROS: The standard lacing technique is easy to do and is the most common lacing method used for running shoes. It provides a secure fit and keeps the shoes in place while running.
CONS: The standard lacing technique does not provide much support or flexibility. It can cause pressure points on the top of the foot, leading to discomfort and even pain.
2. Heel Lock or Runner's Loop Lacing
The heel lock lacing technique assists in securing the foot by preventing heel slippage at the rear as well as preventing the foot sliding forwards in the shoe. This technique is particularly useful for people with a narrow heel, those who have a tendency to get blisters on the heel, and those with black toenails as a result from the foot sliding forward and hitting the front of the shoe.
METHOD: See the slider above.
To use the heel lock lacing technique, start by lacing the shoes normally until you reach the second eyelet below the top on each side. Instead of crossing over again, pull each lace end up on the same side, inserting it into the top eyelet on that side; you’ll form a loop. Then, cross the laces over and thread them through the loops on the opposite side of the shoe, pulling them tight. Finally, tie the laces as usual.
PROS: The heel lock lacing technique provides extra support and prevents the heel from slipping in the shoe. It can also reduce the risk of blisters and other foot injuries.
CONS: The heel lock lacing technique can be a bit more complicated to do, and it can take some time to get used to the feeling of the laces pulling on the top of the foot.
3. Window Lacing
If your running shoes are causing an uncomfortable pressure point on the top of your foot, window lacing (aka “box lacing”) can help alleviate the problem:

METHOD: Unlace the shoe down to the eyelet that is just below the pressure point. Re-lace by going straight up to the next eyelet and then crossing the laces over. Finish lacing the rest of your shoe in your usual way.
PROS: The window lacing technique provides extra room where required, reducing the risk of blisters and other foot injuries.
CONS: The window lacing technique can create a loose fit in the midfoot,
which can cause the shoe to feel unstable while running.
The Unravelling Shoe Lace
There is nothing more frustrating on a run than discovering your shoelaces have come undone. Does this happen often to you or do your laces often twist while you're running? The simple method to tie a shoelace we were taught as kids works majority the of the time, except when it doesn't. We were taught either the GRANNY or the REEF Knot.
Tension forces occur in our shoe laces as we run, this in turn causes a knot to either tighten becoming more secure (Reef Knot) or to slowly unravel itself (Granny Knot).
A GRANNY Knot when tied, sits diagonally across the shoe. When tension is applied to the inside laces at the eyelet, the knot slowly loosens over time.
A REEF Knot when tied sits in a straight line from left to right across the shoe, when tension is applied to the inside laces at the eyelet, the knot fastens and secures itself. Regarded as a more secure knot.

How do I know which I am tying, you ask? Try this:
Tie your knot in the usual way. Now grasp your tied shoe by the top eyelets and pull sideways.
If the loop ends skew slightly so that at least one loop is down rather than directly sideways, you tied a not-so-dependable Granny knot.
If your pull test leaves the final bows lying perpendicular to the sides of the shoe, then you have yourself a Reef knot and you’re good to go.
METHOD to transform your Granny Knot into a Reef Knot:
It usually requires one or two quick fixes:
Do all steps the same: Cross and snug the laces, then form your first loop the same way.
Now, reverse the path of the lace as you form your second loop: If you always pass the lace on top of the first loop, then pass it under the second loop this time (or vice versa). This is the step that fixes the knot.
Finish the knot and do the pull test.
End with a double knot to secure the lace.
NB: At the end of a RUN
Lastly, and very important, ALWAYS untie your shoelaces before removing your running shoes. Keeping a shoe laced and forcing your foot in/out of the shoe will over time, stretch the heel cup thereby resulting in a shoe which is no longer secure. Thus creating a high possibility of heel slippage, foot sliding and black toenails that a lacing technique will no longer be able to solve.
That extra minute will save in the *long run. 🤦🏻♀️ (*pun intended)
Happy running!


